The Jaw-Dropping Homemade Secret That’s Making Hands Look Years Younger – Get Ready to Be Shocked!
Let’s be real, you glance down at your hands and BAM! They’re telling a story you didn’t sign up for. All that daily grind, sun exposure, and constant washing? It’s leaving your hands looking dry, rough, and blotchy – basically, screaming for help. You know the feeling, right? That little cringe when you shake someone’s hand or try to snap a selfie, wishing your *hands* weren’t giving away your age faster than your face. It’s a total confidence killer, sneaking up on you like a bad habit. But what if I told you there’s a dirt-cheap combo, probably sitting in your pantry and bathroom right now, that could hit the reset button on your hands and arms? No joke! Stick around, because I’m about to spill the tea on this viral DIY scrub – exactly how to whip it up and why the internet is losing its mind over it. Get ready for *younger-looking hands*!
Why This Baking Soda and Toothpaste Trend Is Blowing Up Right Now
You’ve probably scrolled past those insane before-and-after photos all over social media: one hand looking like it’s seen better days, the other suddenly smoother and brighter after a quick at-home fix. People are absolutely *obsessed* with a super simple scrub made from good ol’ baking soda and a tube of toothpaste – yeah, the stuff you use every morning! This trend isn’t just for kicks; it’s zeroing in on your hands and arms because, let’s face it, these spots are usually the first to show the wear and tear. But here’s the real talk – don’t expect a magic wand. What you *can* expect is an easy, affordable way to level up your weekly routine, helping you achieve that fresher, more radiant skin appearance you’ve been craving. It’s all about consistent, gentle skin exfoliation for truly *youthful hands*.
What Makes Baking Soda and Toothpaste a Dynamic Duo for Your Skin
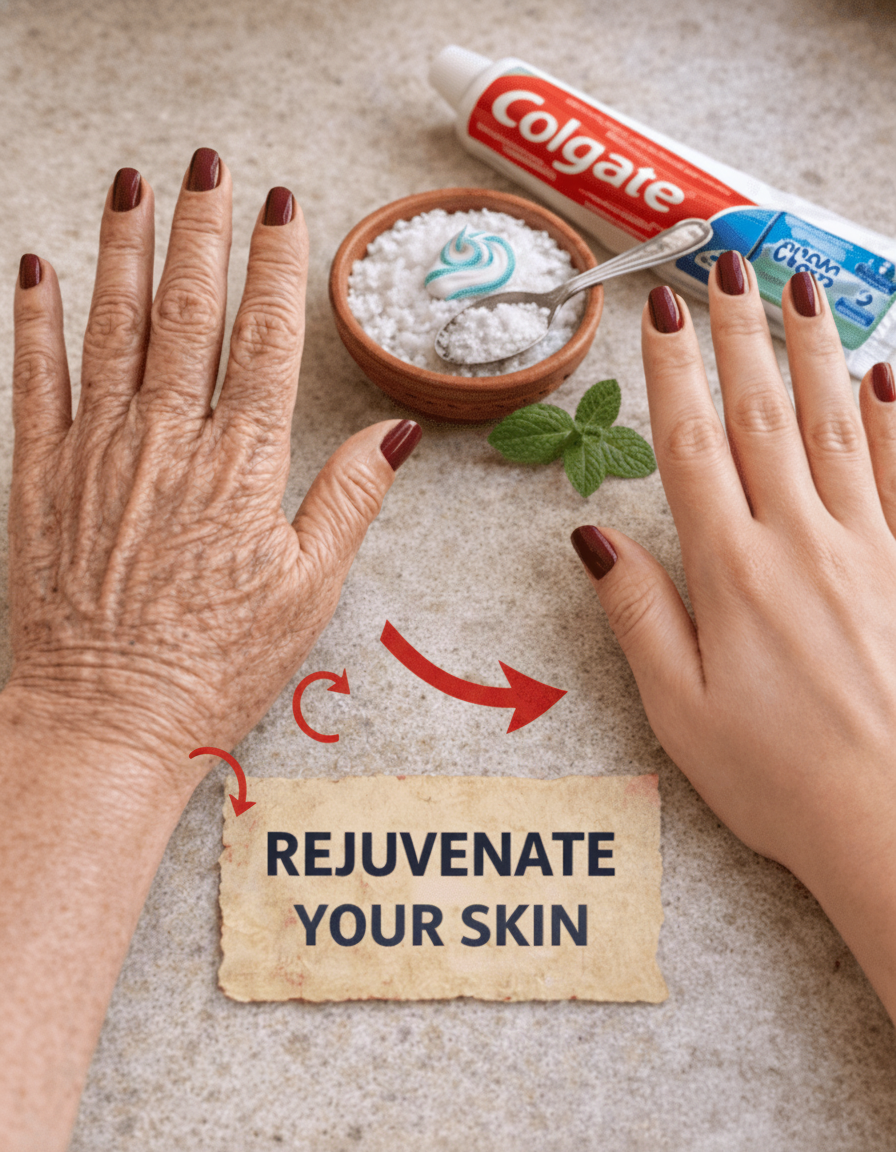
So, what’s the secret sauce? Baking soda steps up as a killer, mild exfoliant. When it gets a little damp, its slightly gritty texture goes to work, buffing away the dull stuff. Then, you’ve got toothpaste – especially the classic varieties like Colgate, packed with its own gentle abrasives and that cool, refreshing menthol kick. Together, these two create a powerful yet balanced paste that users are slathering directly onto clean, damp skin on the hands and forearms. Science backs it up: gentle mechanical exfoliation can seriously help ditch those dead surface cells, paving the way for a brighter, smoother look over time. Of course, everyone’s skin is different, so results will vary – but trust us, it’s worth a shot! And for that extra VIP touch, many folks are tossing in fresh mint leaves for a scent that’s pure bliss and an even more refreshing feel. Who knew your kitchen held the key to *smooth skin hands*?
Here’s the lowdown on why this combo wipes the floor with basic hand creams:
- Baking soda alone: Gives you that exfoliation, sure, but it can leave your skin feeling drier than a desert if you don’t pair it with something moisturizing.
- Toothpaste alone: Delivers mild abrasives and that cool sensation, but it just doesn’t have the grit needed for a deeper surface renewal that truly makes a difference.
- Combined scrub: This is where the magic happens! You get a perfectly balanced paste that feels incredibly effective yet gentle, especially when you use it smart.
Your Go-To, Step-by-Step Playbook for This DIY Hand Scrub
Alright, ready to roll up your sleeves and try this game-changing method? Good! This whole process takes less than five minutes – seriously, five minutes – and uses stuff you probably already have stashed in your kitchen or bathroom. Follow these steps to the letter for jaw-dropping results.
- Gear up: Grab 2 tablespoons of baking soda, 1 tablespoon of your go-to toothpaste (Colgate’s minty fresh punch is a fan favorite!), a small wooden or ceramic bowl, a trusty metal spoon, and if you’re feeling fancy, a few fresh mint leaves.
- First things first: Dump the baking soda into your bowl.
- Next up: Squeeze that toothpaste right on top. Then, get to mixing with your spoon until you’ve got a thick, spreadable paste. If it’s playing hard to get and feels too stiff, just add a drop or two of water.
- Minty fresh bonus: Crush those mint leaves and stir ’em in for an extra burst of natural aroma that’ll make your senses sing.
- Prep time: Give your hands and arms a good wash and dry. We’re talking squeaky clean here!
- Scrub time: Scoop out a small dollop of the paste and gently work it onto your skin using circular motions. Aim for about one minute per area. Really hit those backs of the hands and forearms – that’s where the texture often screams the loudest.
- Rinse and shine: Wash it all off thoroughly with lukewarm water. Pat dry, and immediately follow up with your absolute favorite moisturizer. This seals in all that newfound softness and helps achieve those *anti-aging hands* results.
Boom! You’re done. Many smart folks are making this a weekly ritual, doing it once or twice as part of their evening wind-down. It’s a simple hack for *hand care secret* success.
Crucial Safety Tips & Pro Moves for Your DIY Hand Rejuvenation
Look, this trend might be simple, but don’t just wing it! Baking soda packs an alkaline punch, so going overboard could leave your skin tight, dry, or even irritated. We don’t want that! Here are the golden rules to keep things comfy, effective, and totally safe:
- Patch test like a pro: ALWAYS do a patch test on a tiny spot of your inner arm a full 24 hours before you go all in. No shortcuts here!
- Don’t overdo it: Stick to using this homemade hand treatment no more than twice a week. More isn’t better; it’s just asking for trouble with over-exfoliation.
- Pick your paste wisely: Go for a non-gel toothpaste and steer clear of anything with super strong whitening agents. We’re aiming for gentle results, not a chemical peel!
- Know your limits: If you’ve got super sensitive, broken, or eczematous skin, just skip this one. Your skin needs TLC, not a scrub.
- Timing is everything: Never leave the paste on for longer than the instructed one minute per area to avoid irritation. Listen to your skin!
So there you have it, folks! The secret to hands that look incredibly younger, right from your own home. Who needs expensive treatments when you’ve got these kitchen and bathroom heroes? Give it a whirl and prepare to be amazed!
Want more game-changing tips and tricks to live your best life? Dive deeper into our Healthy Life section for more incredible insights and DIY wonders! Your journey to a healthier, happier you starts here.