Sick of Warts & Skin Tags? Hydrogen Peroxide: Your Secret Weapon for Easy Home Removal!
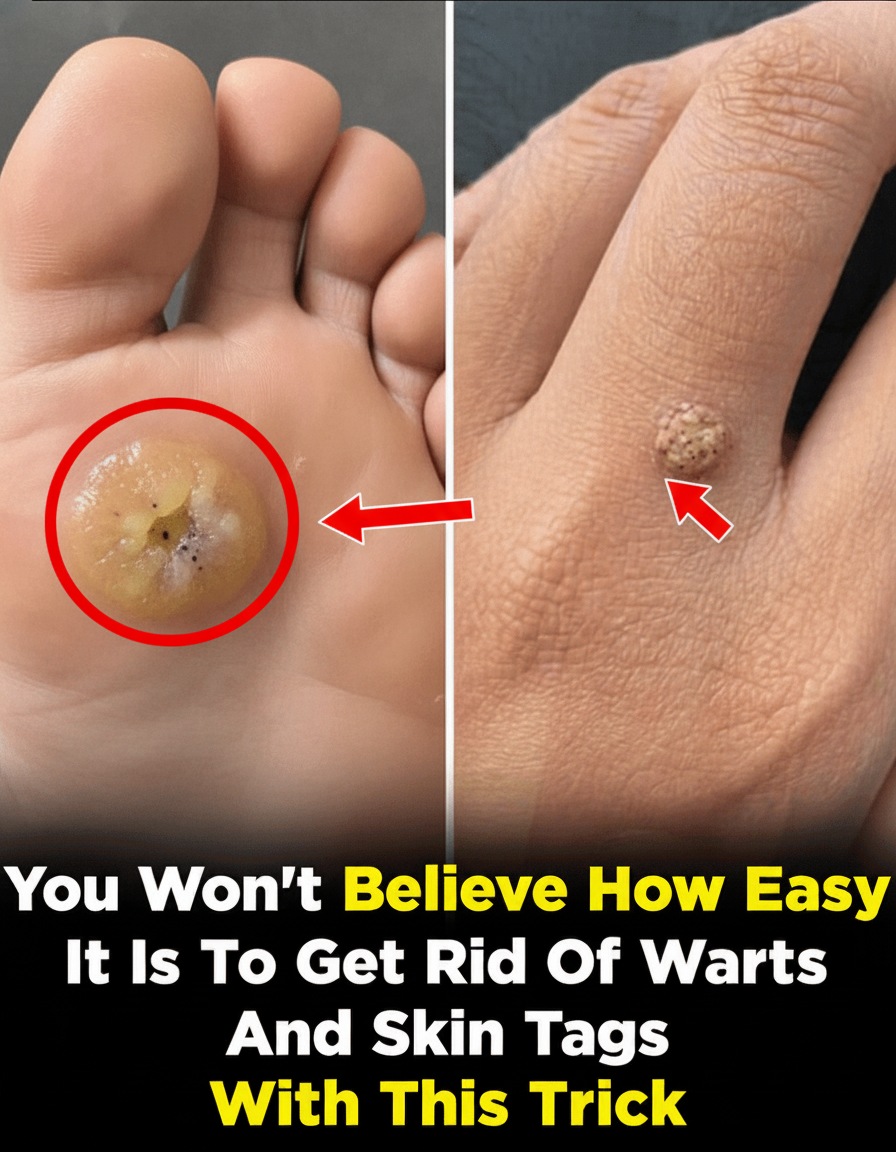
Got those damn common warts popping up like uninvited guests? Talk about a nightmare! Especially when they cling to your hands, feet, or any other spot everyone can see, refusing to budge no matter what you throw at ’em. These gnarly, raised bumps, thanks to the human papillomavirus (HPV), can seriously mess with your head. Shaking a hand? Wearing sandals? Suddenly, you’re shrinking into yourself, your confidence taking a beating for weeks, even months. But hold up! There’s a silver lining. Loads of folks are ditching the fancy stuff and hitting up their own medicine cabinets for a home-grown solution. And guess what? We’re about to spill the beans on how some smart cookies are safely tackling these nuisances with a common, dirt-cheap over-the-counter remedy. Stay locked in, because I’m gonna walk you through the whole damn process, plus all the crucial warnings you absolutely need to hear.
Warts 101: Why Folks Are Ditching the Doctor for Home Hacks
Alright, let’s get down to brass tacks. What ARE these things? Common warts are basically tiny, harmless skin invaders, kicked off by specific types of HPV sneaking in through a microscopic cut or scrape. They absolutely LOVE warm, damp places – think hands, fingers, or the bottom of your feet. Sure, they might pack up and leave on their own eventually, but who’s got months or even years to wait for these freeloaders to disappear? That’s why people are desperate for quick, sensible ways to keep their skin looking decent. Now, listen up: yeah, the usual suspects like over-the-counter salicylic acid pads or fancy doctor visits work for a lot of people. But let’s be real, sometimes you just wanna start with something easy on the wallet, something already chilling in your bathroom cabinet. And that’s where low-concentration hydrogen peroxide steps into the ring. But wait, there’s more! Smart folks have even dug into how this everyday germ-killer could actually be a player in your home routines.
The REAL Deal: What Science Says About Hydrogen Peroxide & Your Warts
Alright, let’s talk turkey. Hydrogen peroxide? It’s basically a gentle oxidizing agent, sitting pretty on most pharmacy shelves at a 3% concentration – that’s your go-to strength for household use. Now, some serious clinical heavyweights have actually put this stuff to the test, checking its power when slapped directly onto non-genital warts. Get this: a 2020 randomized controlled trial, straight out of the Journal of Cosmetic Dermatology, dropped some interesting findings. Both 3% and 6% solutions showed some damn promising results for non-genital warts, especially when used regularly under a cover, with people reporting clear improvements and hardly any nasty side effects. The big idea? This solution might just make your skin a hostile takeover zone for the virus, gently busting up proteins on the skin surface. BUT – and this is a HUGE “but” – everyone’s skin is different, so your mileage may vary. And for the love of all that’s holy, DO NOT even think about higher concentrations (like the hardcore stuff they use in some prescription trials) for home use. That’s just asking for trouble! This info is purely for your brain, not a doctor’s note – always, ALWAYS chat with a healthcare pro to figure out what’s best for your unique situation. But hold your horses, we’ve got even more crucial stuff to chew on before you raid that bathroom cabinet.
Your Battle Plan: How to SAFELY Use Hydrogen Peroxide at Home
Alright, if you’re ready to roll up your sleeves and give this a shot, here’s the no-nonsense, step-by-step game plan that folks are using to safely mess with 3% hydrogen peroxide. Big warning upfront: this is ONLY for non-genital, non-facial common warts. Got it? Good. First things first: Gear Up. You’ll need a bottle of 3% hydrogen peroxide (the basic first-aid stuff), some squeaky-clean cotton swabs or balls, mild soap, warm water, and maybe a bandage or tape if you wanna try covering it up. Next, Scrub That Zone. Give the wart and the skin around it a good wash with warm water and gentle soap. Then, pat it down till it’s bone-dry with a clean towel. This ain’t rocket science, it just helps the solution hit the target without getting watered down. Now for the main event: Dab It On, Smartly. Grab a fresh cotton swab, dip it in that peroxide, and gently, I mean gently, dab it ONLY onto the wart. Do NOT let that stuff wander onto your good skin. Let It Do Its Thing. Give it a minute or two to air-dry. Some people swear by loosely covering the spot with a bandage afterward – says it helps the magic happen. Finally, Stay Consistent, You Hear? Hit this routine once or twice a day, every single day, for about 1–2 weeks. Keep an eye on things, see what changes. And the kicker? This whole operation takes literally minutes out of your day and uses something you can snag for practically pocket change at any drugstore.
Listen Up! Critical Safety Rules You CANNOT Ignore!
Alright, cut the crap – safety is king, queen, and everything in between! Yeah, 3% hydrogen peroxide is pretty chill, but it’s still a chemical, and you gotta treat it with respect, capiche? Here’s the damn playbook to keep yourself out of trouble and keep things low-risk: First, STICK TO 3%